Components
COMPONENTS
ILLUSTRATION
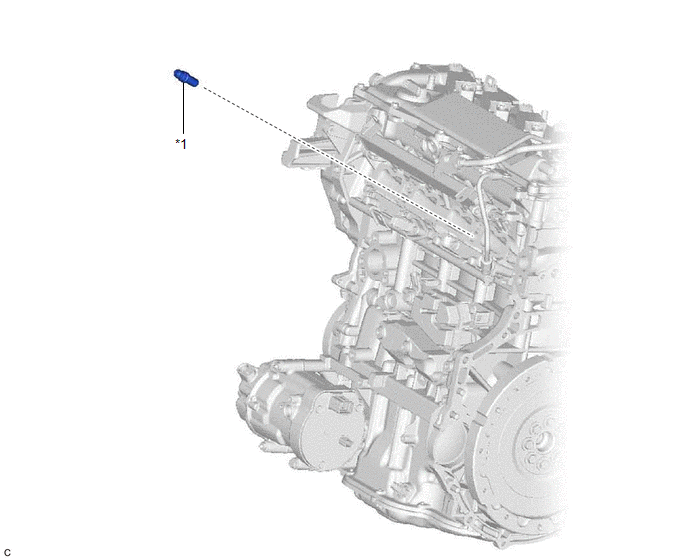
|
*1 | PCV VALVE (VENTILATION VALVE SUB-ASSEMBLY) |
- | - |
Inspection
INSPECTION
PROCEDURE
1. INSPECT PCV VALVE (VENTILATION VALVE SUB-ASSEMBLY)
(a) Install a hose to the PCV valve (ventilation valve sub-assembly).
(b) Check the PCV valve (ventilation valve sub-assembly) operation.
(1) Blow air into the cylinder head sub-assembly side, and check that air passes through easily.
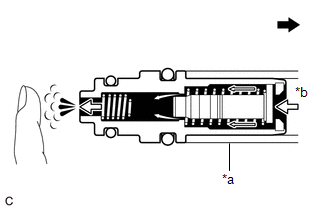
|
*a | Hose |
|
*b | Air |
 |
Cylinder Head Sub-assembly Side |
CAUTION:
Do not suck air through the valve.
Petroleum substances inside the valve are hazardous to your health.
If the result is not as specified, replace the PCV valve (ventilation valve sub-assembly).
(2) Blow air into the intake manifold side, and check that air passes through with difficulty.
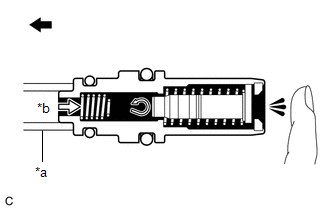
|
*a | Hose |
|
*b | Air |
 |
Intake Manifold Side |
CAUTION:
Do not suck air through the valve.
Petroleum substances inside the valve are hazardous to your health.
If the result is not as specified, replace the PCV valve (ventilation valve sub-assembly).
(c) Remove the hose from the PCV valve (ventilation valve sub-assembly).
Installation
INSTALLATION
CAUTION / NOTICE / HINT
NOTICE:
This
procedure includes the installation of small-head bolts. Refer to
Small-Head Bolts of Basic Repair Hint to identify the small-head bolts.
Click here

PROCEDURE
1. INSTALL PCV VALVE (VENTILATION VALVE SUB-ASSEMBLY)
(a) Apply a light coat of engine oil to the O-ring.
NOTICE:
When reusing the PCV valve (ventilation valve sub-assembly), inspect the O-ring.
(b) Install the PCV valve (ventilation valve sub-assembly) to the cylinder head sub-assembly.
2. INSTALL INTAKE MANIFOLD
Click here 
On-vehicle Inspection
ON-VEHICLE INSPECTION
PROCEDURE
1. INSPECT PCV VALVE (VENTILATION VALVE SUB-ASSEMBLY)
(a) Connect the Techstream to the DLC3.
(b) Turn the power switch on (IG).
(c) Turn the Techstream on.
(d) Put the engine in Inspection Mode (Maintenance Mode).
Powertrain > Hybrid Control > Utility
|
Tester Display |
| Inspection Mode |
| (e) Check the PCV valve (ventilation valve sub-assembly) operation.
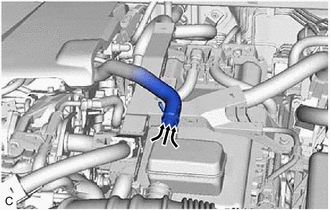
(1) Start the engine. (2) Slide the clip and disconnect the No. 2 ventilation hose from the air cleaner hose assembly.
(3) Check that air is sucked into the No. 2 ventilation hose. Standard:
Air is sucked into the No. 2 ventilation hose. If the result is not as specified, replace the PCV valve (ventilation valve sub-assembly). |
|
Removal
REMOVAL
CAUTION / NOTICE / HINT
The
necessary procedures (adjustment, calibration, initialization or
registration) that must be performed after parts are removed and
installed, or replaced during PCV valve (ventilation valve sub-assembly)
removal/installation are shown below.
Necessary Procedures After Parts Removed/Installed/Replaced |
Replaced Part or Performed Procedure |
Necessary Procedures | Effect/Inoperative Function when Necessary Procedure not Performed |
Link |
- Replacement of throttle body with motor assembly
- Cleaning the deposits from the throttle body with motor assembly
- Replacement of EGR valve assembly
- Gas leak from exhaust system is repaired
| Inspection After Repair |
- Poor idle, etc.
- Engine start function, etc.
|
 |
NOTICE:
This
procedure includes the removal of small-head bolts. Refer to Small-Head
Bolts of Basic Repair Hint to identify the small-head bolts.
Click here

PROCEDURE
1. REMOVE INTAKE MANIFOLD
Click here 
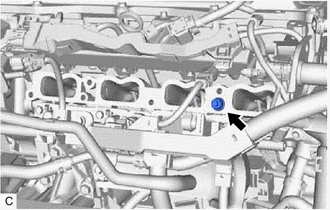
2. REMOVE PCV VALVE (VENTILATION VALVE SUB-ASSEMBLY)
| (a) Remove the PCV valve (ventilation valve sub-assembly) from the cylinder head sub-assembly. |
|


